
7 January 2026/
We have launched a powerful Online Bank to Tally Utility at e2t.in. This Excel to Tally Bank Import Utility Online...
We have launched a powerful Online Bank to Tally Utility at e2t.in. This Excel to Tally Bank Import Utility Online...
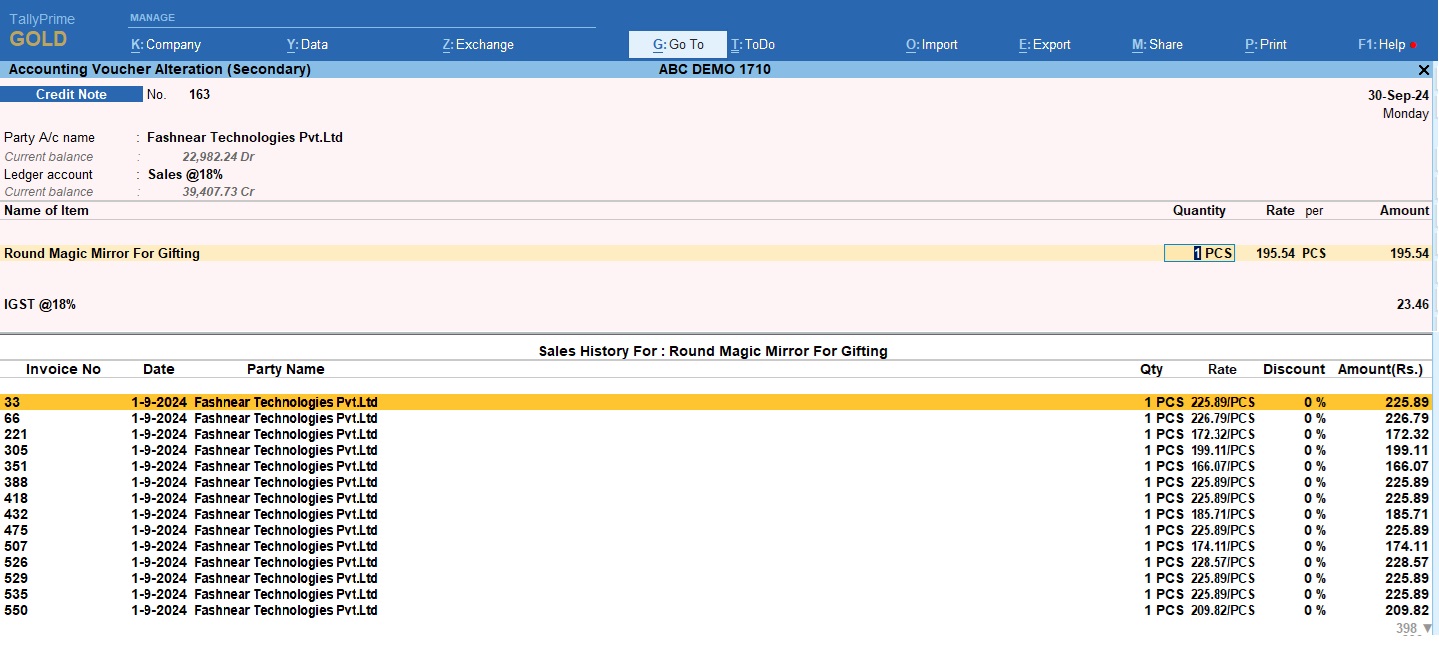
2025 Best Item Sales History Tally Prime TDL. Tally Prime is a Best Business software, you can also use it...
If you are a business owner, an accountant, or a CA using Tally Prime for your accounting purposes, the Amazing...

With this trick we will create Unlimited High Quality AI images, with the help of google colab. Artificial intelligence (AI)...

With this automatic Ultimate Ecommerce Reconciliation utility we can reconcile all type E-commerce platforms (Amazon, Flipkart, Meesho, Myntra etc.) sales...

This Tally TDL to See Party Wise and Product Wise Sale Report will help to see which item you sold...

Starting a business can be a daunting task, especially if you don’t have a lot of money to invest. But...

In the GST regime, it is compulsory to mention the HSN code in all the invoices issued by a business....

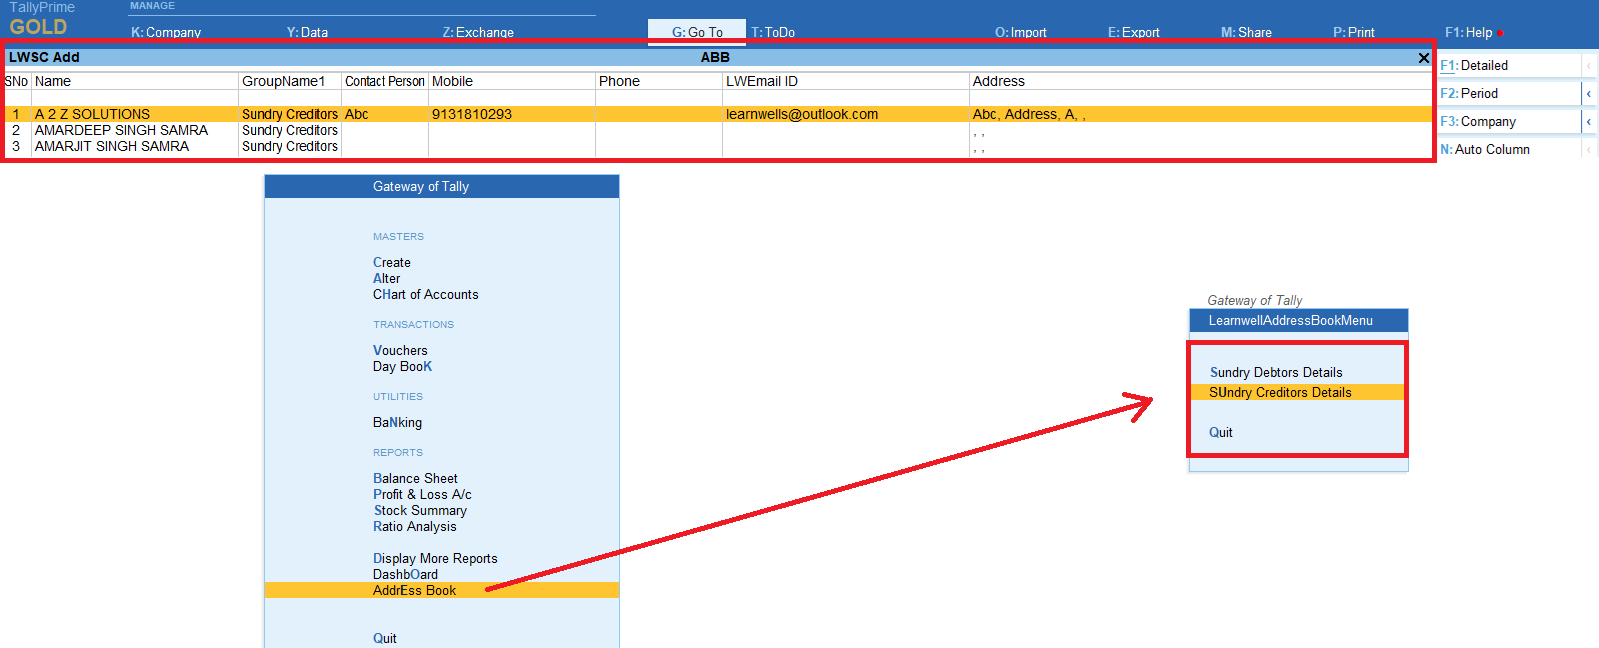
If we want to replace wrongly entered ledgers and stock item in Tally Prime or in Tally Erp9, we need...